After months of searching & learning, there is finally a way…
I am thrilled to be able to finally give back, after years of reading these forums and learning from the community.
TLDR; Create a Custom User Interface for OpenTable Reservations.
While this will only redirect users to their website for booking confirmation, its a lot better looking than the options available from OpenTable.

This all started as…
I’m building a website for a client which needs to have OpenTable integration. One might think they could visit OpenTable and create a widget to their liking. The problem is that OpenTable’s customization options are very very limited. There are only 3 sizes to pick from, all branded with their logo, not customizable. Not to mention they are iFrames which are impossible to use with Google Tag Manager to track conversions.
This custom widget leverages the Form Block to collect the data to be passed through to OpenTables API, a free Date Picker from FlowBase to select the date, and some custom code to pass the responses through to the OpenTable API.
Start by adding a form, the 4 fields required to make this work are :
- Location
- Date
- Time
- Guests
The Location, Time, and Guests fields leverage the Select Lists
Add a Select List - (I recommend creating a new one each time to ensure proper naming)
Name the Select Field “Location”. The “text field” is up to you. The “value” should be set to the OpenTable restaurant ID. That can be found on the OpenTable profile, more info here

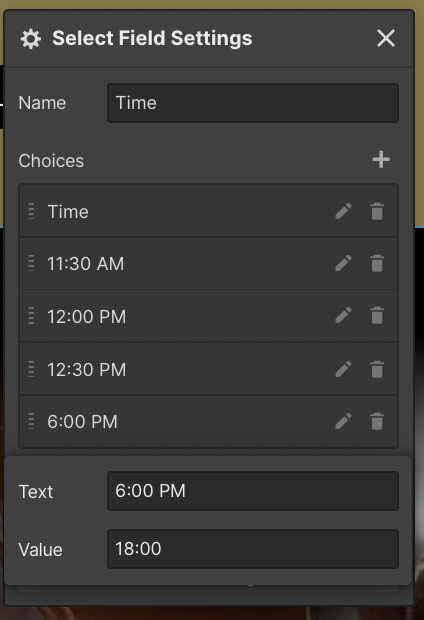
Create a new Select List for the Time. Name the Select Field “Time”. Create as many choices as you would like. I would recommend every 30 minutes. Set the “text field”.
Set the value to the corresponding time in 24 hour time format. This is Essential.
Create a new Select List for number of Guests. Once again, create as many as you would like. The “text” and “value” should be the same.

The Date field uses the Date Picker from FlowBase. They have a great guide on how to install.
When installing, it is essential to reformat the date. This will not work unless reformatted.
Go to line 6 of code and change format from:
format: 'mm-dd-yyyy'
to
format: 'yyyy-mm-dd'
The OpenTable API will not recognize any other format & you will spend hours debugging like I did ![]()
This is all the data that’s needed to setup the API request. Now let’s add some custom code to take the values from this form and inject it into the API request. This was inspired by another community members answer here .
With the help of ChatGPT I was able to amend the script to open the reservation page in a new tab.
Before Body tag on the page, add this code to inject the form data into the API request.
<script>
  Webflow.push(function() {
    $('form').submit(function(event) {
      event.preventDefault();
      setTimeout(function() {
        window.open(
          'https://www.opentable.com/restref/client/?restref=' + $('#Location').val() + '&datetime=' + $('#Date').val() + 'T' + $('#Time').val() + '&covers=' + $('#Guests').val(),
          '_blank'
        );
      }, 100);
    });
  });
  </script>
The last thing I did, was add “#” to the “action” setting on the button. This reloads the page after opening the OpenTable link in a new tab. If you skip this step, the Form success message will populate and remove the beautiful new reservation widget you just built.

While there is no current native way to book reservations on the website that I could find, I hope others find this as useful as I did.
Happy Webflowing !