AppointmentThing is an appointment scheduling service that allows you to add a booking link or an embeddable booking form to your website. This is a great way to let your users easily schedule an appointment or a meeting with you.
Highlighted features:
- Your users can schedule a meeting with you without ever leaving your Webflow website
- Letting users book directly can boost conversions for sales calls, demo calls, initial consultations and more – make sure every lead turns into a customer
- By showing your live booking calendar directly on your website, you can let users find a time that works for them and you will eliminate endless email threads and phone calls trying to find a time that works for everyone
- Customize the booking form to ask questions – this lets you collect the information you need so you can prepare in advance of your meetings
- Automated reminders are a great way to ensure that users don’t forget about your scheduled appointment
This tutorial will show you in 6 simple steps how to add and appointment scheduling form to you webflow website:
-
Sign up for AppointmentThing.com
Go to AppointmentThing.com and click “Sign up”. There’s a free two-week trial of the Pro Plan available when you sign up (with no credit card required), and when that’s over, you can keep using the free plan forever. -
Set up the Appointment Types you want to offer and the times you are available
Within the scheduling app, you can set different appointment types for different services you offer or you could just offer customers a choice of meeting lengths. You can also offer just one appointment type if you want to keep it really simple.
-
Navigate to the ‘Appointment Types’ page on AppointmentThing.com

-
Create a new “Appointment Type” (or select one of your existing “Appointment Types”).
-
Enter your appointment details in the “About” tab, and set your appointment availability in the “Availability” tab.
-
When you’ve created the appointment type, navigate back to the “Appointment Types”.
-
Copy the link or embed code to your booking page
Copy your link or embed code to your general appointment booking page if you want to offer more than one appointment type, or to a specific appointment type otherwise.
- Click the “Embed” icon as shown in the image below
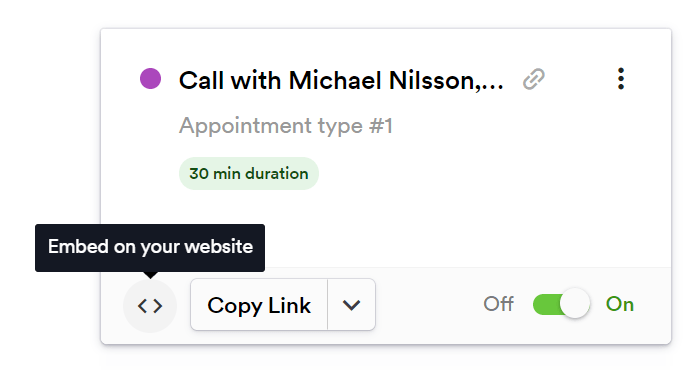
- You will now see a new window. Select the “Inline Embed” option. Select the Appointment Types you want to embed on your Wix website, and copy the widget code.

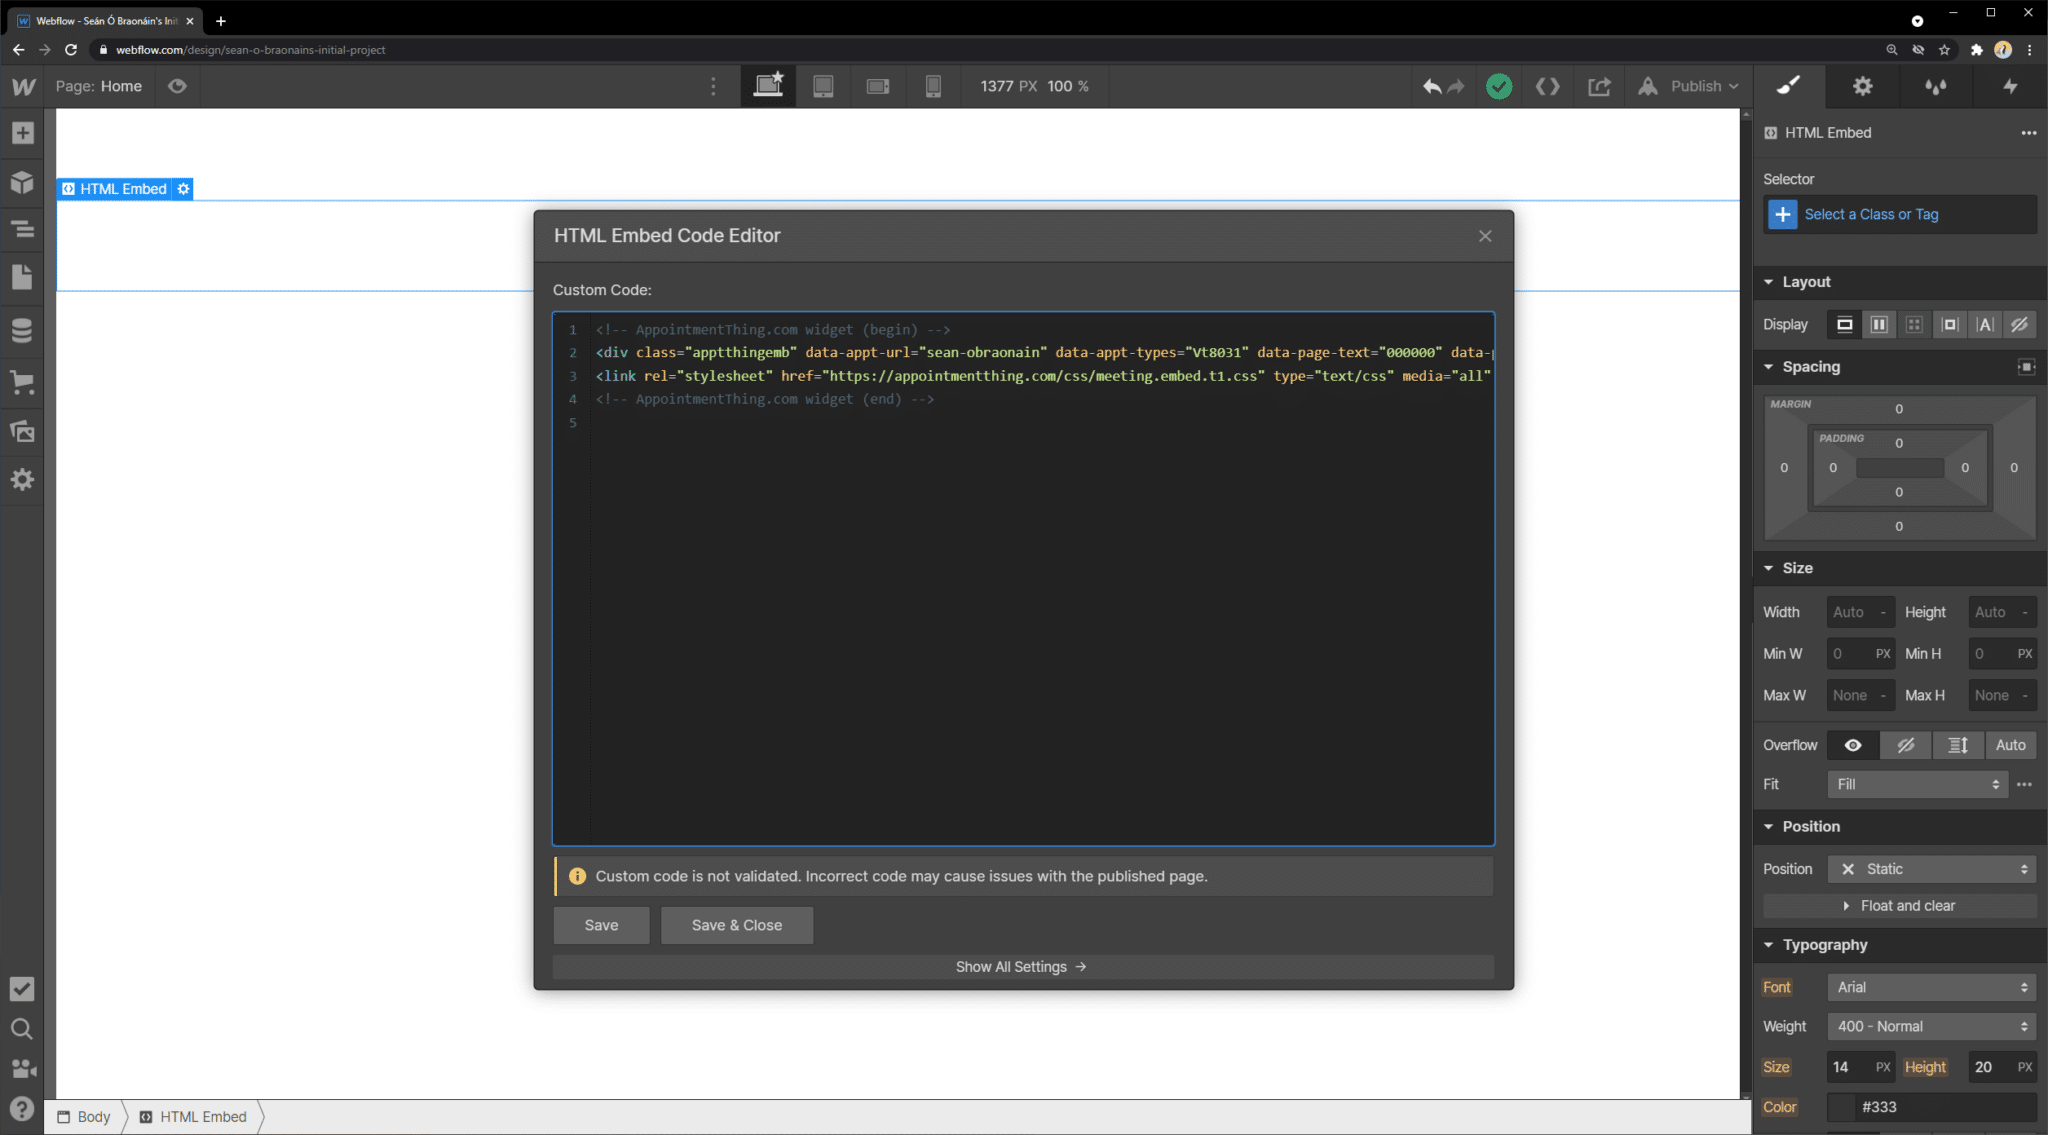
4. Paste your code into the Webflow website editor.
Log into your account on webflow.com (or click signup if you don’t already have a Webflow account). Open the Webflow site designer and click the “+” icon in the top left hand corner. Scroll down to the “Components” section and choose “Embed” from the options. Drag the embed block into the page and the element will appear on your website. You can drag the element to where it needs to go. Once you have the embed added, paste the code you copied earlier from AppointmentThing.